From a Macropad to 3D Printing: Learning by Building
Building my own macropad started as a focused hardware project. I wanted to design something small but useful, work through the electronics, assemble it, flash the firmware, and have a finished device at the end of it. It was hands-on, practical, and very contained in scope.
What it unexpectedly did was make me more comfortable working with physical things.
Once I had gone through the process of designing, assembling, and iterating on hardware, I started noticing other everyday problems differently—especially ones that involved physical constraints rather than software limitations. Around the same time, I needed a custom mounting solution for a security camera at home.
That’s what pushed me into learning 3D design and 3D printing. Not to extend the macropad project itself, but because building it had lowered the barrier to solving physical problems on my own.
Getting into 3D Printing
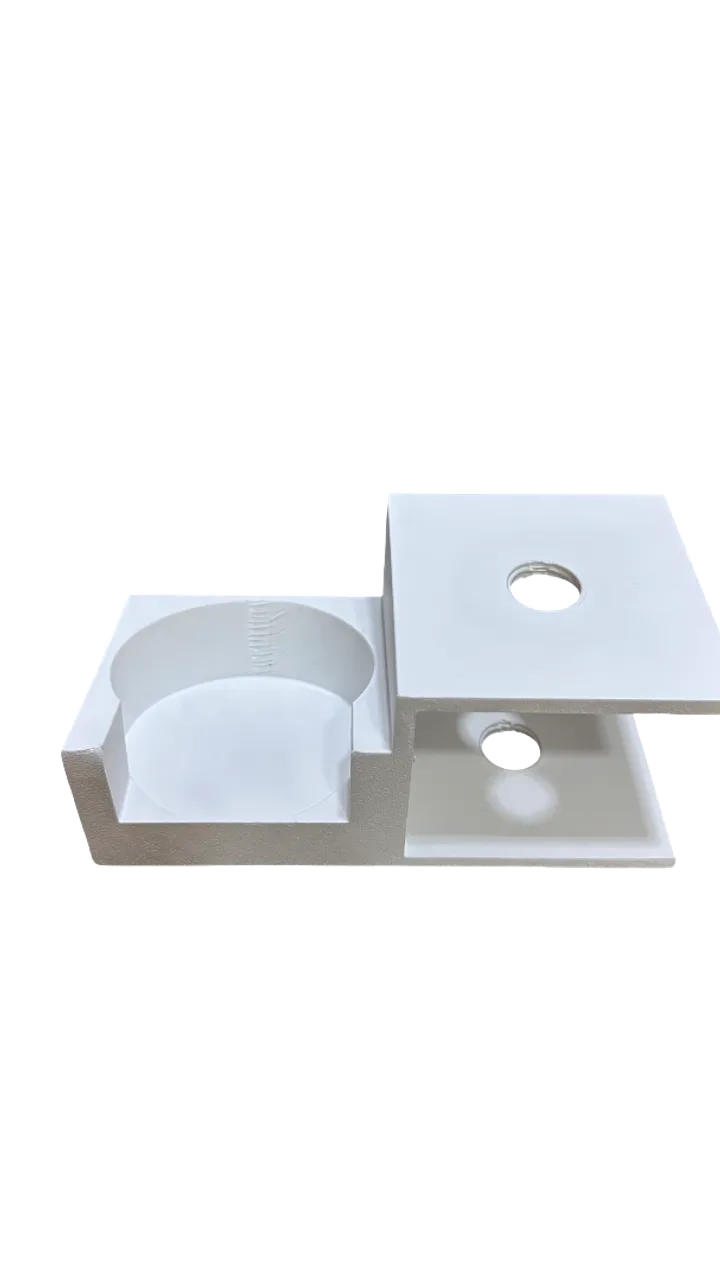
I chose to build a custom mount because it felt like a good entry point into 3D design. The geometry was simple, but it still had just enough complexity—a slight angle(for better viewing in downward direction), proper fit, and weight distribution—to make it interesting.
Making sure the load was balanced so the bracket wouldn’t be under constant strain added another real-world constraint. Even though similar solutions probably exist, I wanted to design and build one myself. Once, i decided to give it a try. I decided to learn 3D printing from scratch.
I started the way most people do today:
- Reading blog posts and documentation
- Watching a lot of YouTube videos
- Going through Reddit threads and community discussions
At first, it felt overwhelming. There were too many opinions, too many printer models, and too many techniques. But over time, a few patterns started to emerge.
Choosing the right printer type
One of the first big decisions is choosing the printing technology. I looked into:
- FDM (Fused Deposition Modeling)
- SLA / resin printing
- Other specialized or industrial options
For a first project, FDM made the most sense:
- Lower cost of entry
- Easier setup and maintenance
- Widely available materials
- Plenty of community knowledge
More importantly, FDM is well-suited for functional parts, where strength and durability matter more than surface finish. For a camera mount that needed to hold weight over time, that trade-off felt reasonable. Next, i started researching specific printer models.
And after a lot of comparison, I settled on a popular, well-reviewed model with a strong community presence and right in my budget. And went with Bambu Labs A1 Mini, as it was highly rated for its print quality, ease of use, and reliability.
Measuring the physical world
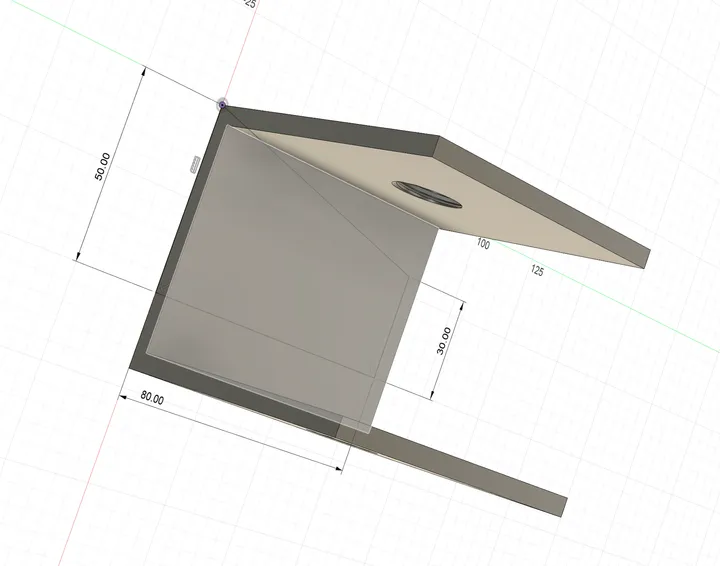
Before jumping into 3D design, I needed to take precise measurements of the camera and the mounting location. I remember learning about calipers in school and never imagining I’d own one. Now I was using it regularly to measure widths, thicknesses, gaps, and clearances.
Getting accurate measurements is crucial in 3D printing. Even small errors can lead to parts that don’t fit or function properly. I took my time measuring everything multiple times to ensure accuracy. And then started sketching out rough designs on paper. This is where it started to feel real, and I was excited to see how my measurements would translate into a physical object.
Learning 3D design software
With measurements in hand, I needed to translate them into a 3D model. I chose Fusion 360 as my design software because of its balance between power and user-friendliness. There was a wealth of tutorials available, and it seemed well-suited for both beginners and more advanced users.
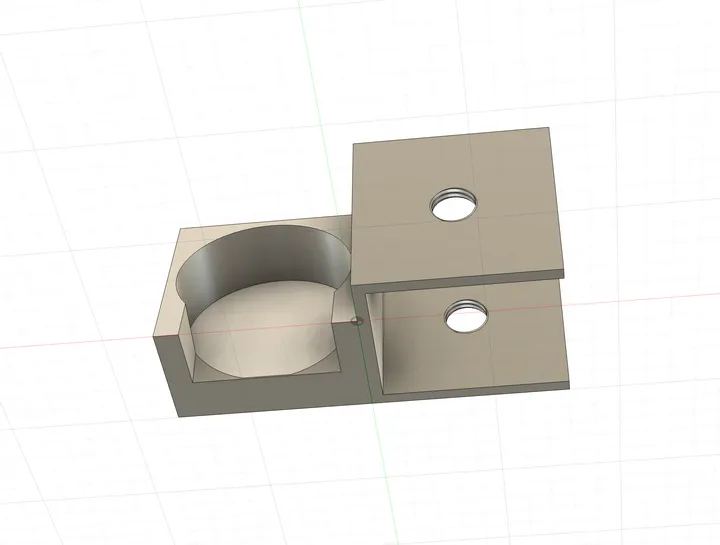
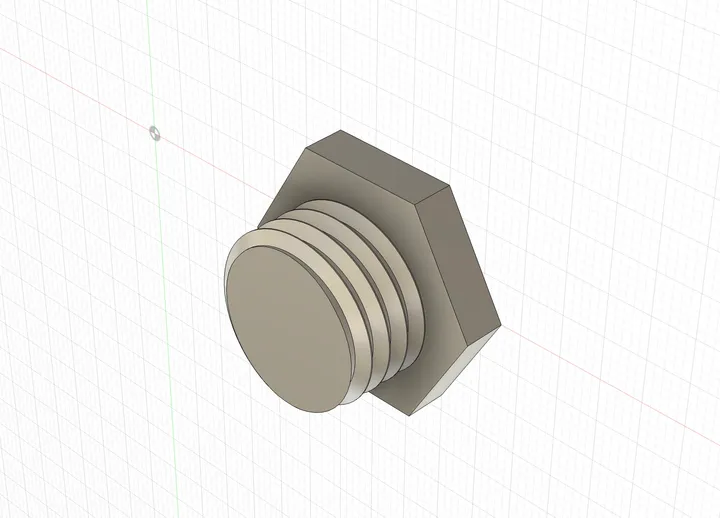
In the process of designing the mount as a beginer, what felt most challenging was the slat angle that i discussed above for better viewing. I had to learn how to create angled surfaces, fillets for strength, and cutouts for screws. It took several iterations to get the design right, but each time I learned something new about the software, and i am sure the final solution that i came up with might not be the most optimal one. But it worked, and that was what mattered most as a beginer.
Printing and Iterating
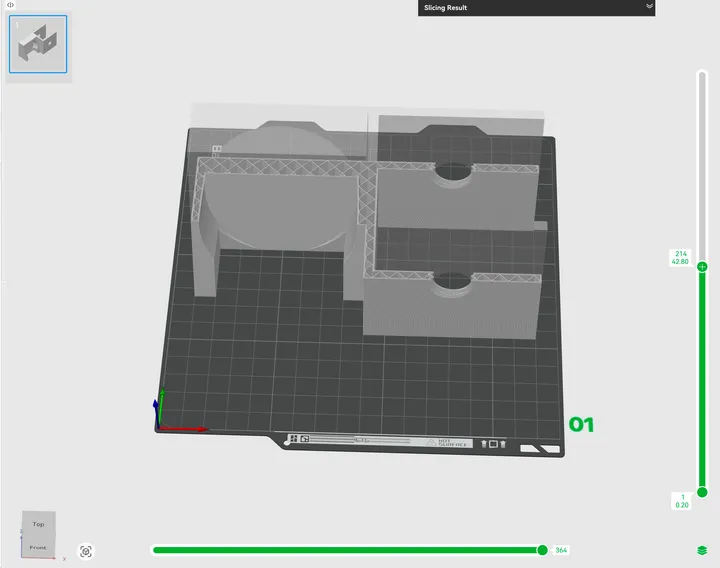
Once the model felt ready, the next step was preparing it for printing. I exported the design as an STL file and imported it into the slicer. For printing any 3D model, slicing software is used to convert the 3D design into instructions that the printer can understand. This is called G-code. I used Bambu Studio, which came with my printer, to slice my model and prepare it for printing.
This is where the abstract model becomes a set of instructions the printer can actually follow. In the slicer, I had to decide on:
- Layer height
- Infill density
- Wall thickness
- Print orientation
- Support generation (if needed)
These settings had a direct impact on strength, print time, and material usage. It reinforced the idea that printing quality depends just as much on slicer settings as on the design itself.
Printing the Design Itself
Before committing to the final print, I ran a few partial and test prints to validate:
- Tolerances
- Fit
- Structural strength
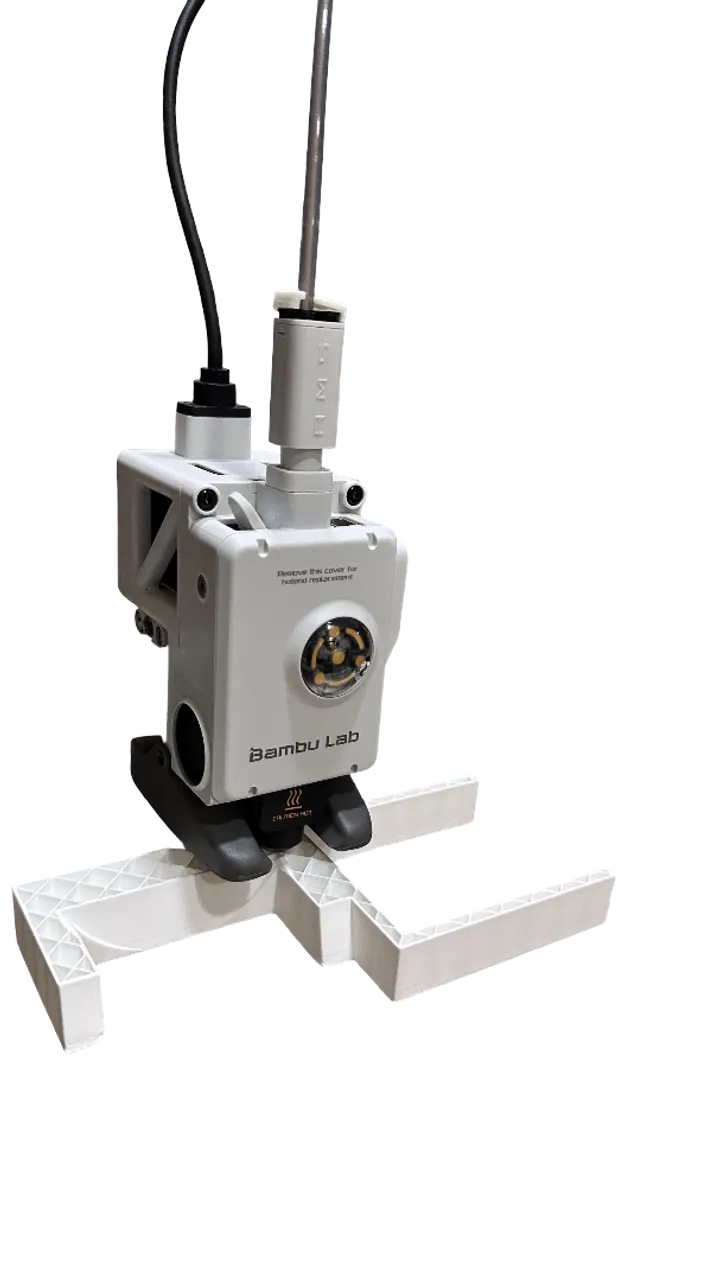
After around 3–4 rough prints, I finalized the design. Watching the part take shape layer by layer was still satisfying, even after multiple test runs.
Once printed, the mount fit as expected and has been in regular use since. Using a physical object that I designed and printed myself made the entire process feel complete.
Links to the STL files
Things i learned
Designing a physical object, printing it, and then using it regularly made the outcome feel incredibly tangible. Every design decision—good or bad—was immediately apparent when interacting with the object in the real world. Working through 3D design and printing also helped me develop a different way of thinking. It made me consider aspects like:
- Space and form
- Weight and balance
- Stress and durability
- Tolerances and real-world fit
These are considerations that are easy to overlook, but crucial when creating functional objects. Iterating through sketches, models, and test prints also reinforced the value of patience and iterative problem-solving.
I’d encourage anyone, even as a hobby, to try some 3D design or modeling. It’s a great way to explore new ways of thinking and get hands-on experience creating something you can actually touch and use.